
AndroidAnnotations 框架是一个开源框架,用于提高 Android 开发的效率。通过使用它提供的注解,可以使代码变得更加简洁,请看例子。
这是没有使用 AndroidAnnotations 注解的代码:
public class MainActivity extends Activity {
    // 定义按钮
    Button btnChange;

    @Override
    protected void onCreate(Bundle savedInstanceState) {
        super.onCreate(savedInstanceState);
        setContentView(R.layout.main);

        // 实例化按钮
        btnRequest = (Button) findViewById(R.id.btnRequest);
    }
}
这是使用注释后的代码:
@EActivity(R.layout.main)
public class MainActivity extends Activity {
    // 定义并实例化按钮
    @ViewById
    Button btnChange;
}
可以看出,使用注释后的代码减少了一半,而且看起来更加简洁。
下面我们以 IntelliJ IDEA 14 为例,来介绍怎样在 IntelliJ IDEA 中 AndroidAnnotations 框架。
注意,只有 Android 项目才能使用 AndroidAnnotations 框架。
一、新建 Android 项目
如果已有 Android 项目则跳过这一部分。
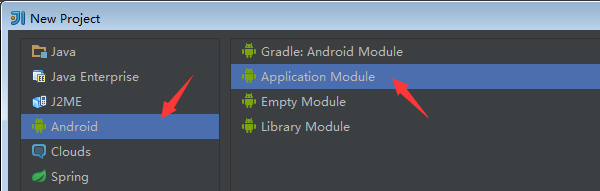
1、选择项目类型
点击“File > New Project…”菜单打开新建项目窗口,选择“Android > Application Module”项目类型,然后点击“Next”按钮。
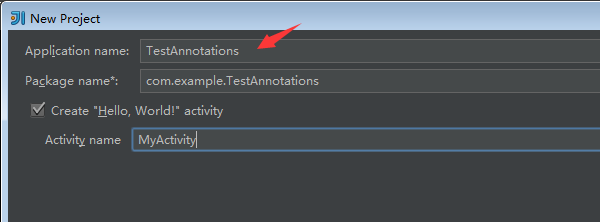
2、定义项目名称
在下一个窗口中将项目命名为 TestAnnotations,再点击“Next”按钮。
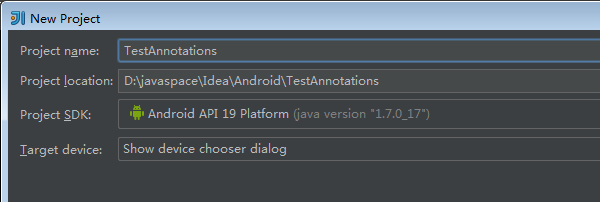
3、完成项目的创建
在第三个窗口中保持默认值,点击“Finish”按钮完成项目的创建。如果“Project SDK”没有设置,则还需要添加设置。
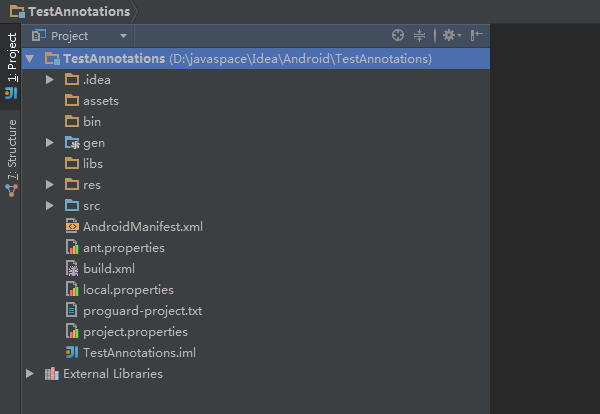
新建的项目结构如下:
二、添加 Maven 支持
Maven 是用来管理项目的工具,特别是管理项目依赖非常方便。
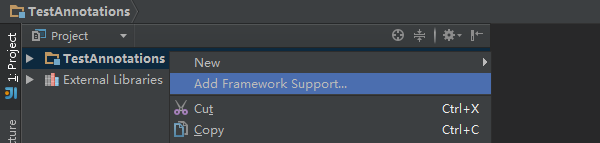
1、打开框架支持的添加窗口
在 IntelliJ IDEA 中右键点击项目名称,在出现的快捷菜单中选择“Add Framework Support…”。
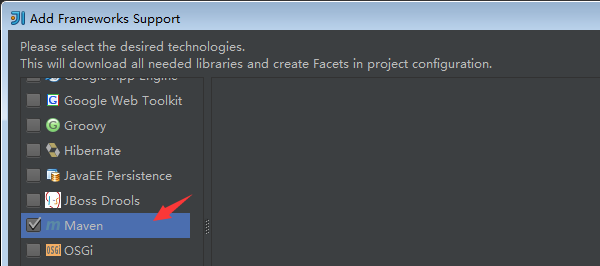
2、添加 Maven 构架
在出现的“Add Frameworks Support”窗口中选择“Maven”,然后点击“OK”按钮完成 Maven 的添加。
在项目的根目录会出现 Maven 的配置文件 pom.xml,这表示项目已经支持 Moven 框架。
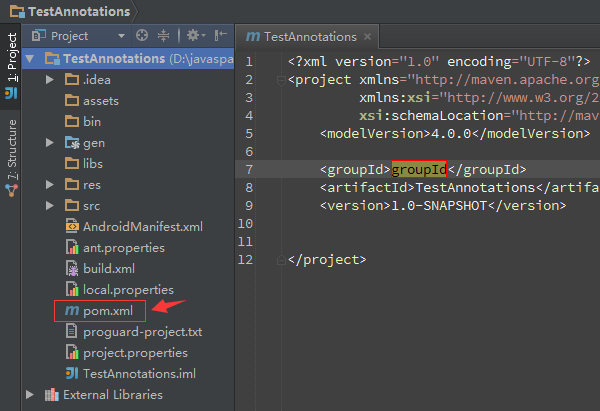
初始化的 pom.xml 文件内容如下:
<?xml version="1.0" encoding="UTF-8"?>
<project xmlns="http://maven.apache.org/POM/4.0.0"
         xmlns:xsi="http://www.w3.org/2001/XMLSchema-instance"
         xsi:schemaLocation="http://maven.apache.org/POM/4.0.0 http://maven.apache.org/xsd/maven-4.0.0.xsd">
    <modelVersion>4.0.0</modelVersion>

    <groupId>groupId</groupId>
    <artifactId>TestAnnotations</artifactId>
    <version>1.0-SNAPSHOT</version>

</project>
三、添加 AndroidAnnotations 依赖
修改 pom.xml 文件添加 AndroidAnnotations 依赖:
<?xml version="1.0" encoding="UTF-8"?>
<project xmlns="http://maven.apache.org/POM/4.0.0"
         xmlns:xsi="http://www.w3.org/2001/XMLSchema-instance"
         xsi:schemaLocation="http://maven.apache.org/POM/4.0.0 http://maven.apache.org/xsd/maven-4.0.0.xsd">
    <modelVersion>4.0.0</modelVersion>

    <groupId>groupId</groupId>
    <artifactId>TestAnnotations</artifactId>
    <version>1.0-SNAPSHOT</version>

    <dependencies>
        <!--androidannotations-->
        <dependency>
            <groupId>org.androidannotations</groupId>
            <artifactId>androidannotations</artifactId>
            <version>3.2</version>
            <scope>provided</scope>
        </dependency>
        <dependency>
            <groupId>org.androidannotations</groupId>
            <artifactId>androidannotations-api</artifactId>
            <version>3.2</version>
        </dependency>
    </dependencies>
</project>
修改完 pom.xml 文件后,IntelliJ IDEA 右上角会出现内容为“Maven projects need to be imported”的提示框。点击其中的“Enable Auto-Import”链接让 Maven 自动导入在 pom.xml 文件中添加的依赖包。

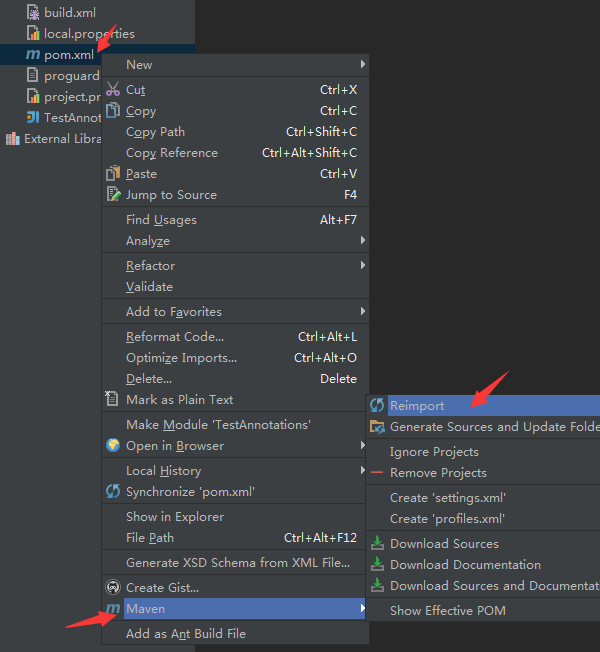
如果错过了该提示框,可以在 pom.xml 文件的右键菜单中选择“Maven > Reimport”来手动导入依赖包。
Maven 导入依赖包是通过网络进行的,有时候可能需要“翻墙”。
四、使用 AndroidAnnotations 注解
1、修改 layout 文件
修改 R.layout.main 文件,设置 TextView 对象的 id。
<?xml version="1.0" encoding="utf-8"?>
<LinearLayout xmlns:android="http://schemas.android.com/apk/res/android"
              android:orientation="vertical"
              android:layout_width="fill_parent"
              android:layout_height="fill_parent"
        >
    <TextView
            android:layout_width="fill_parent"
            android:layout_height="wrap_content"
            android:text="Hello World, MyActivity"
            android:id="@+id/tvMessage"/>
</LinearLayout>
2、修改 Activity 文件
@EActivity(R.layout.main)
public class MyActivity extends Activity {
    @ViewById
    TextView tvMessage;

    @Override
    protected void onStart() {
        super.onStart();
        // 直接引用 tvMessage 对象
        tvMessage.setText("Hello Annotations");
    }
}
3、修改 AnroidManifest.xml 配置文件
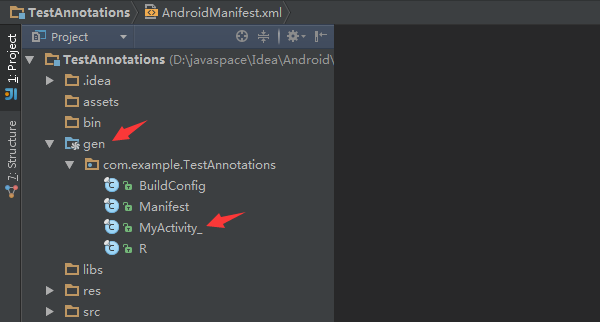
使用 @EActivity 注解后,MyActivity 会生成新的 MyActivity_(名称后面加下划线)用于实际的应用,比如 AnroidManifest.xml 配置或在其它 Activity 中的引用等。就是说 AndroidAnnotations 注解的 Activity 类变成了中间类,带下划线的类才是最终要使用类。
<?xml version="1.0" encoding="utf-8"?>
<manifest xmlns:android="http://schemas.android.com/apk/res/android"
          package="com.example.TestAnnotations"
          android:versionCode="1"
          android:versionName="1.0">
    <uses-sdk android:minSdkVersion="19"/>
    <application android:label="@string/app_name" android:icon="@drawable/ic_launcher">
        <activity android:name="MyActivity_"
                  android:label="@string/app_name">
            <intent-filter>
                <action android:name="android.intent.action.MAIN"/>
                <category android:name="android.intent.category.LAUNCHER"/>
            </intent-filter>
        </activity>
    </application>
</manifest>
如果编译时显示找不到 MyActivity_ 等生成类,就重新再编译一次。用 @EApplication 注解 Application 后,也会生成带下划线的新 Application。
4、修改项目的“生产源目录”
生产源目录(Production sources directory)用于指定新生成源文件(比如 MyActivity_.java 文件)所在的目录。
在 Settings 窗口的“Build,Execution,Deployment > Compiler > Annotation Processors”页面,将对应项目的“Store generated sources relative to”设置为“Module content root”,然后将“Production sources directory”设置为“gen”后保存。
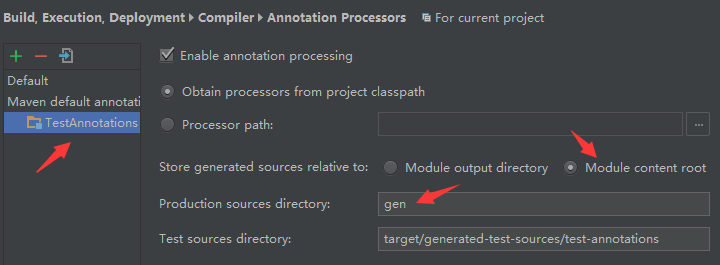
设置完成后,重新编译项目就会在“gen”目录下生成对应的 MyActivity_ 类。这个 MyActivity_ 类就是实际要使用的 Activity,有兴趣可以将其打开看看。
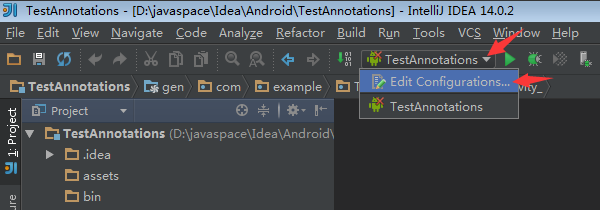
5、设置启动 Activity
通过工具栏上的“Edit Configurations”下拉框打开“Run/Debug Configurations”窗口。
在“Run/Debug Configurations”窗口中将该项目的“Activity”项设置为“Launch default Activity”。
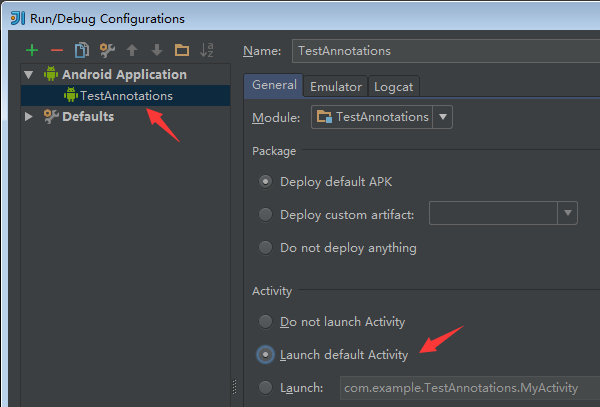
点击工具栏上的运行按钮,在运行起来的项目中会显示“Hello Annotations”标签,则表示项目已 AndroidAnnotations 使用正确!
